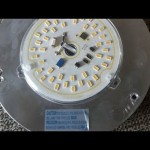
Removing Recessed Lights Ceiling

By | January 6, 2023

Removing Recessed Lights from a Ceiling: A Step-by-Step Guide

Recessed lights, also known as can lights or downlights, provide ambient lighting by emitting light downward. They are popular in modern homes and commercial spaces due to their sleek and unobtrusive design. However, if you need to replace or remove recessed lights, it's important to follow the proper steps to avoid damaging the ceiling or electrical system.

Removing recessed lights requires basic electrical knowledge and tools. Here's a comprehensive guide to help you safely and effectively remove recessed lights from your ceiling:

1. Safety First

Before starting, it's crucial to ensure your safety by turning off the electricity at the circuit breaker. Verify that the power is off using a non-contact voltage tester.

2. Locate the Trim Ring

Most recessed lights have a removable trim ring that covers the fixture. Gently pull the trim ring straight down to detach it.

3. Disconnect the Electrical Wires

Once the trim ring is removed, you'll see the electrical wires connected to the recessed light socket. Using insulated pliers or a screwdriver, carefully disconnect the wires by pushing the wire nuts down and pulling the wires apart. Make sure to note the color-coding of the wires for reconnecting later.

4. Remove the Socket

After disconnecting the wires, remove the recessed light socket. The socket may be held in place by spring clips or screws. If there are spring clips, push them inward and lift the socket; for screws, unscrew them and detach the socket.

5. Inspect the Junction Box

With the socket removed, you'll have access to the junction box. Check the wires and connections within the box for any damage or loose connections. If necessary, tighten any loose connections or replace damaged wires.

6. Remove the Housing

The housing of the recessed light may be attached to the ceiling by springs or screws. Locate the fasteners and carefully disengage them to remove the housing.

7. Patch the Ceiling

Once the recessed light is removed, you may need to patch the ceiling hole. Cut a piece of drywall that fits the hole and secure it with drywall screws. Apply spackling paste over the screws and let it dry. Once dry, sand the patch smooth and paint it to match the ceiling.

Tips for Removing Recessed Lights

  • Wear gloves and safety glasses for protection.
  • Have a helper to assist with holding or disconnecting wires.
  • Label the wires as you disconnect them for easy reconnecting.
  • If you encounter any electrical issues, seek professional assistance from an electrician.

By following these steps, you can safely and effectively remove recessed lights from your ceiling. If you need to replace the lights with new ones, reverse the steps to install the new fixtures.


Replace An Led Recessed Light Bulb

Easy Ways To Replace An Led Recessed Light Bulb 13 Steps

How To Remove Recessed Light Cover

How To Remove Recessed Light Cover Without Any Damage Brightest Lumen

Remove Old Recessed Light Housing

How To Remove Old Recessed Light Housing Honor Services

Remove Recessed Light Fixture

Remove Recessed Light Fixture Doityourself Com Community Forums

How To Remove Recessed Lighting Can

How To Remove Recessed Lighting Can Doityourself Com Community Forums

Recessed Lights In False Ceiling

How To Change Downlights Or Recessed Lights In False Ceiling Electrician Singapore Recommended Services

How To Change A Recessed Light Bulb

How To Change A Recessed Light Bulb

Recessed Lights To Led

How To Update Old And Yellowed Recessed Lights Led Thrifty Decor Diy Organizing

Change A Recessed Or Canned Light Bulb

How To Change A Recessed Or Canned Light Bulb

Removing Recessed Box Fluorescent

Removing Recessed Box Fluorescent Lighting Hometalk


Leave a Reply

Your email address will not be published. Required fields are marked *

This site uses Akismet to reduce spam. Learn how your comment data is processed.