Essential Aspects of Repairing Ceiling Fan Light Sockets
Maintaining a functional ceiling fan includes ensuring the light socket operates properly. Repairing these sockets involves addressing several critical aspects that determine their performance and safety. This article will delve into the essential aspects of ceiling fan light socket repair, providing a comprehensive guide to homeowners seeking to address this common issue.
Safety Precautions
Before commencing any electrical work, it is imperative to observe safety precautions. Turn off the electricity at the circuit breaker panel and use a non-contact voltage tester to verify that the power has been disconnected. Wear protective gloves and safety glasses to minimize the risk of injury.
Identifying the Socket Type
Ceiling fans employ various types of light sockets, including incandescent, fluorescent, and LED sockets. Accurately identifying the socket type is crucial for selecting the appropriate replacement parts. Refer to the fan's manual or consult with an electrician if you are unsure about the socket type.
Inspecting the Wiring
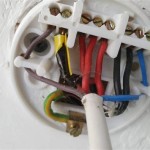
Loose connections or damaged wires can disrupt the electrical flow to the light socket. Remove the socket cover and inspect the wiring for any fraying, exposed wires, or loose terminals. Tighten any loose connections using a screwdriver and replace any damaged wires with new ones of the same gauge.
Testing the Socket
Once the wiring has been inspected, test the socket using a multimeter. Set the multimeter to the voltage setting and connect the leads to the socket terminals. A reading of 120 volts indicates a functional socket. If no voltage is detected, the socket may be faulty and needs to be replaced.
Replacing the Socket
If the socket is faulty, it must be replaced. Disconnect the wires from the old socket and note their positions for accurate reconnection. Remove the old socket by unscrewing it from the ceiling fan assembly. Install the new socket by tightening it into place and reconnecting the wires to the appropriate terminals.
Installing the Light Fixture
Once the socket has been replaced, install the light fixture by screwing it into the socket. Ensure that the fixture is securely attached and there are no loose connections. Restore power at the circuit breaker panel and test the light fixture to ensure it operates properly.
Troubleshooting Light Fixture Issues
If the light fixture does not operate after replacing the socket, consider the following troubleshooting steps. Check the lightbulb, as it may be burned out. Inspect the switch wiring to ensure proper connections. Verify that the fuse associated with the ceiling fan circuit has not blown. If these steps do not resolve the issue, consult with an electrician for further assistance.

How To Replace A Ceiling Fan With Pendant Light

Ceiling Fan Light Repair Home Tutor

Ceiling Fan Light Repair Home Tutor

Replacing A Ceiling Fan Light With Regular Fixture Jlc
Ceiling Fan Light Fixture Replacement Ifixit Repair Guide

How To Fix This Light Bulb Socket R Howto
Replacing A Ceiling Fan Light With Regular Fixture Jlc
Ceiling Fan Light Fixture Replacement Ifixit Repair Guide

How To Replace A Ceiling Fan With Pendant Light

How To Fix This Light Bulb Socket R Howto
Related Posts


