Replace Kitchen Ceiling Light: A Step-by-Step Guide
The kitchen is the heart of the home, and good lighting is essential for creating a functional and inviting space. If your kitchen ceiling light is outdated or malfunctioning, it's time to replace it. Here's a comprehensive guide to help you get the job done safely and efficiently:
Step 1: Safety First
Before starting any electrical work, ensure safety. Turn off the power to the light fixture at the circuit breaker. Verify that the power is off using a voltage tester. Wear safety glasses and gloves for protection.
Step 2: Gather Tools and Materials
You'll need the following tools and materials:
- New ceiling light fixture
- Screwdriver
- Wire strippers
- Electrical tape
- Wire connectors
- Ladder or step stool
- Voltage tester
Step 3: Remove Existing Light Fixture
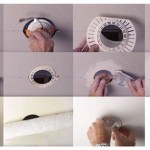
Using a screwdriver, carefully remove the screws that hold the light fixture's canopy to the ceiling. Detach the canopy and set it aside. Identify the electrical wires and disconnect them from the light fixture by unscrewing the wire nuts.
Step 4: Prepare Electrical Wires
Strip about 1/2 inch of insulation from the ends of the electrical wires. Twist the exposed copper wires clockwise to create a secure connection.
Step 5: Connect Electrical Wires
Match the white wires and connect them using a wire connector. Twist clockwise until snug.
Next, match the black wires and connect them using another wire connector. Twist clockwise.
Finally, match the bare copper ground wire (if present) and connect it using a separate wire connector. Twist clockwise.
Step 6: Install New Light Fixture
Align the mounting bracket of the new light fixture with the electrical wires.
Lift the light fixture and secure it to the ceiling using the screws provided.
Step 7: Attach Canopy and Bulb
Attach the canopy to the mounting bracket and secure it with screws.
Install the light bulb into the new light fixture.
Step 8: Turn Power Back On
Return to the circuit breaker and turn the power back on.
Test the light fixture to ensure it's working properly.
Tips for Choosing a New Light Fixture
Consider the following factors when selecting a new kitchen ceiling light fixture:
- The size and shape of your kitchen
- The style of your kitchen décor
- The amount of natural light in your kitchen
- The type of light bulb you want to use
- The energy efficiency of the fixture
Conclusion
Replacing a kitchen ceiling light is a relatively simple task that can be completed in less than an hour with the right tools and safety precautions. By following these steps carefully, you can ensure that your kitchen is well-lit and safe.

How To Replace An Old Fluorescent Light Fixture Young House Love

How To Replace An Old Fluorescent Light Fixture Young House Love

How To Replace An Old Fluorescent Light Fixture Young House Love

How To Update Old Kitchen Lights Recessedlighting Com

How To Update Old Kitchen Lights Recessedlighting Com

Replacing Fluorescent Light Boxes In Your Kitchen My Design Rules

Removing A Fluorescent Kitchen Light Box The Kim Six Fix

How To Replace An Old Fluorescent Light Fixture Young House Love

How To Create A Beautiful Effective Kitchen Lighting Design Bob Vila

How To Replace A Fluorescent Light With An Led Flush Mount Kitchen Update Tutorial Create Enjoy
Related Posts


