Essential Aspects of Replacing Lights on a Ceiling Fan
Ceiling fans, with their dual functionality of providing both illumination and airflow, are indispensable fixtures in many homes. However, the need may arise to replace the lights on these fans over time, whether due to burnout, damage, or a desire to upgrade the lighting scheme. To ensure a successful and safe replacement process, consider the following essential aspects.
Compatibility with Ceiling Fan
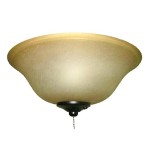
Before purchasing new lights, verify their compatibility with your specific ceiling fan model. This involves checking the fan's wattage capacity and socket type (e.g., E26, GU10). Refer to the user manual or the fan's product page for this information.
Light Source and Brightness
Consider the type of light source you prefer: incandescent, fluorescent, LED, or halogen. Each has its advantages in terms of lifespan, energy efficiency, and color rendering. Additionally, determine the desired brightness for the space, measured in lumens. Higher lumen values indicate brighter lights.
Aesthetics and Style
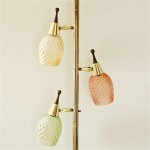
Lights on ceiling fans can significantly impact the room's ambiance and décor. Opt for lights that complement the fan's design and the overall style of the room. Consider the size, shape, and color of the lights to create a harmonious visual appeal.
Installation Safety
Replacing ceiling fan lights involves electrical work. Ensure you have adequate knowledge and experience in handling electrical components before attempting the task. If not, it is advisable to seek professional assistance to prevent potential safety hazards.
Step-by-Step Replacement Guide
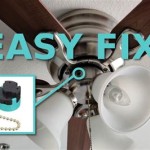
To replace the lights:
- Turn off the electricity supply to the ceiling fan at the circuit breaker or fuse box.
- Remove the existing lights by unscrewing the nuts holding them in place.
- Match the wires from the new lights to the wires in the fan, ensuring the correct polarity (black to black, white to white, and green or bare copper to ground wire).
- Securely connect the wires using wire nuts and tape.
- Screw the new lights into place and tighten the nuts.
- Restore power to the fan and test the lights.
By adhering to these essential aspects, you can ensure the safe and successful replacement of lights on your ceiling fan. Enhance your home's illumination and ambiance with confidence!

4 Ways To Replace A Light Bulb In Ceiling Fan Wikihow

How To Replace A Ceiling Fan Light Kit Smafan Com

4 Ways To Replace A Light Bulb In Ceiling Fan Wikihow

4 Ways To Replace A Light Bulb In Ceiling Fan Wikihow

Ceiling Fan Light Fixture Replacement Ifixit Repair Guide

4 Ways To Replace A Light Bulb In Ceiling Fan Wikihow

How To Replace A Light Fixture With Ceiling Fan Projects By Peter

Replacing The Light On A Ceiling Fan Universal Fans

4 Ways To Replace A Light Bulb In Ceiling Fan Wikihow

How To Replace A Light Fixture With Ceiling Fan Projects By Peter
Related Posts