Replace Recessed Ceiling Light Fixture
Replacing a recessed ceiling light fixture might seem daunting, but it's a straightforward process that can be completed in a few simple steps. Whether you're upgrading your existing lighting or installing a new fixture for the first time, this guide will provide you with the essential steps to ensure a successful installation.
Gather Necessary Materials and Tools
Before starting, gather the following materials and tools:
- Replacement light fixture
- Electrical tape
- Wire strippers
- Phillips head screwdriver
- Safety glasses
Safety First
Always turn off the power to the circuit at the breaker panel before starting any electrical work. Wear safety glasses to protect your eyes from debris. To confirm that the power is off, use a voltage tester to check the wires.
Remove the Old Fixture
Locate the trim ring around the fixture and carefully pry it away from the ceiling using a flathead screwdriver or putty knife. Once removed, you'll have access to the fixture housing. Disconnect the electrical wires by unscrewing the wire nuts holding them together. Support the fixture housing to prevent it from falling while you disconnect the wires. Carefully lower the housing through the hole in the ceiling.
Prepare the New Fixture
Remove the mounting brackets from the new fixture and adjust them to match the spacing of the brackets on the old fixture. Connect the black wires together using a wire nut, and do the same for the white wires. Wrap electrical tape around each connection to secure it.
Install the New Fixture
Carefully lift the new fixture housing into the hole in the ceiling. Align the mounting brackets with the holes in the junction box and secure them with screws. Push the trim ring back into place, making sure it snaps securely into the fixture housing.
Restore Power and Test
Turn the power back on at the breaker panel. Flip the light switch to test the new fixture. If the light does not turn on, check the connections to ensure they are secure and that the wires have not been damaged during the installation.
Additional Tips
- Use a fixture support brace for heavier fixtures to provide additional stability.
- If the junction box is not securely attached to the ceiling joist, reinforce it with screws or toggle bolts.
- Consider using LED bulbs for energy efficiency and extended lifespan.
Conclusion
Replacing a recessed ceiling light fixture is a relatively simple task that can significantly enhance the ambiance and functionality of your room. By following these steps carefully and taking necessary safety precautions, you can complete the installation successfully and enjoy the benefits of your new lighting fixture.
Easy Ways To Replace An Led Recessed Light Bulb 13 Steps
Replace Recessed Light With A Pendant Fixture
How To Guide Replace Recessed Lighting Flip The Switch
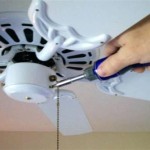
Convert Recessed Lighting Into A Pendant Light By Using Adapter Cozy Stylish Chic
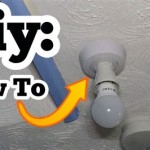
How To Change A Recessed Light Bulb
How To Put Recessed Lights In The Ceiling
How To Convert Recessed Light Pendant Full Tutorial Anika S Diy Life
Recessed Lighting Maximize Your Energy Efficiency Cost Savings
8 Recessed Lighting Installation Tips For Diyers Bob Vila
How To Change Downlights Or Recessed Lights In False Ceiling Electrician Singapore Recommended Services
Related Posts