Replacing a Recessed Ceiling Light Fixture
Recessed ceiling light fixtures are a common and versatile lighting solution found in many homes and commercial buildings. They provide ambient lighting and can be used to accentuate specific areas of a room. However, over time, these fixtures may need to be replaced due to wear and tear, outdated appearance, or changes in lighting needs. Replacing a recessed ceiling light fixture is a relatively simple task that can be completed with a few basic tools and some electrical knowledge.
Safety First
Before starting any electrical work, it's crucial to ensure safety. Turn off the power to the circuit that supplies the light fixture you plan to replace. This can be done by flipping the corresponding breaker in your electrical panel. Use a non-contact voltage tester to confirm that the power is off before proceeding.
Removing the Old Fixture
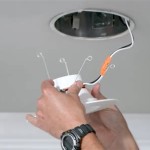
Once the power is off, you can begin removing the old fixture. Locate the trim ring around the fixture and carefully pry it loose using a flathead screwdriver or putty knife. Once the trim ring is removed, you will see the fixture's housing and electrical connections.
Disconnect the electrical wires by loosening the wire nuts and pulling the wires apart. If the fixture has a ground wire, detach it from its terminal.
Next, remove the screws or clips that hold the fixture's housing to the ceiling. Carefully lower the housing and remove it completely.
Installing the New Fixture
Before installing the new fixture, inspect the electrical box to ensure it is in good condition and properly secured. Loose or damaged boxes should be repaired or replaced by a qualified electrician.
Fit the new fixture's housing into the electrical box and secure it using the screws or clips. Connect the electrical wires to the corresponding terminals on the fixture: black to black, white to white, and green or bare copper to the ground terminal.
Tighten the wire nuts securely and ensure that all connections are insulated. Tuck the wires neatly into the electrical box.
Finishing Touches
Once the fixture is wired and secured, place the trim ring back around it and press it into place until it clicks or locks. Turn the power back on and test the light fixture to ensure it is working correctly.
Tips for Success
* Use a ladder stable enough to support your weight and reach the fixture comfortably. * Have a helper assist you, especially if the fixture is heavy or requires lifting. * If you encounter any issues or are unsure about the electrical connections, do not hesitate to seek assistance from a qualified electrician. * If the old fixture has an LED bulb, dispose of it properly at an electronics recycling facility. * Consider upgrading to an energy-efficient LED fixture to save energy and reduce long-term costs.
Easy Ways To Replace An Led Recessed Light Bulb 13 Steps

Replace Recessed Light With A Pendant Fixture

How To Guide Replace Recessed Lighting Flip The Switch

How To Put Recessed Lights In The Ceiling

Replace Recessed Light With A Pendant Fixture

8 Recessed Lighting Installation Tips For Diyers Bob Vila

How To Install Recessed Lighting Fixthisbuildthat

How To Replace An Old Fluorescent Light Fixture Young House Love

How To Update Old And Yellowed Recessed Lights Led Thrifty Decor Diy Organizing

How To Install Led Recessed Ceiling Light The Ultimate Guide Cloudy Bay Lighting
Related Posts


