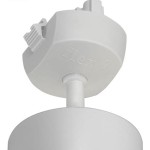
Ring Spotlight Cam Ceiling Mounting Options
The Ring Spotlight Cam is a versatile security camera that offers a wide range of features to help you keep your home safe. One of the best things about the Spotlight Cam is that it can be mounted in a variety of locations, including on the ceiling. Ceiling mounting is a great option if you want to get a wide view of your property or if you want to keep the camera out of reach of potential vandals. In this article, we will discuss the essential aspects of Ring Spotlight Cam ceiling mounting options.
Choosing the Right Location
The first step in ceiling mounting your Ring Spotlight Cam is to choose the right location. You will want to find a spot that gives you a clear view of the area you want to monitor. You should also make sure that the location is within range of your Wi-Fi network. If you are not sure where to mount your camera, you can use the Ring app to help you find the best spot.
Required Tools and Materials
Once you have chosen the right location, you will need to gather the following tools and materials:
- Ring Spotlight Cam
- Mounting bracket
- Screws
- Drill
- Level
- Tape measure
- Safety glasses
Installation Process
Once you have gathered all of the necessary tools and materials, you can begin the installation process. Follow these steps to mount your Ring Spotlight Cam on the ceiling:
- Turn off the power to the area where you will be installing the camera.
- Use the mounting bracket as a template to mark the holes for the screws.
- Drill holes at the marked locations.
- Insert the screws into the holes and tighten them until the mounting bracket is secure.
- Attach the Ring Spotlight Cam to the mounting bracket.
- Turn on the power to the area where you installed the camera.
- Use the Ring app to connect the camera to your Wi-Fi network.
Adjusting the Camera Angle
Once the camera is installed, you can adjust the angle to get the best view of the area you want to monitor. To adjust the angle, simply loosen the screws that hold the camera in place and then move the camera to the desired position. Once you have the camera in the desired position, tighten the screws to secure it in place.
Testing the Camera
Once you have installed and adjusted the camera, you should test it to make sure that it is working properly. To test the camera, simply open the Ring app and select the camera that you want to test. You should then be able to see a live view of the area that the camera is monitoring.
Conclusion
Ceiling mounting is a great option for the Ring Spotlight Cam. By following the steps in this article, you can easily install your camera on the ceiling and get a wide view of your property. If you have any questions about ceiling mounting your Ring Spotlight Cam, please contact Ring customer support.

Ceiling Mount Ring

Ring Spotlight Cam Battery Review Solar Panel Unboxing Setup Settings Installation Footage Lifester

Ceiling Mount Ring
Installing Your Spotlight Cam Mount Ring Help
Installing Your Spotlight Cam Mount Ring Help

Ring 8ks2s7 Wen0 90 Ceiling Mount For Spotlight White

Mounting Your Ring Spotlight Cam Top 6 Options To Consider

Ring Spotlight Cam Wireless Only Balcony And Overhang Mount

Ring Spotlight Cam Pro Review Digital Trends

Spotlight Wired And Ceiling Mount Missing S R Ring
Related Posts


