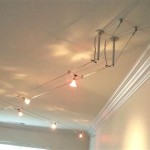
Wiring a Single Ceiling Light
Installing a single ceiling light is a fairly straightforward task that can be completed in a few hours with the right tools and materials. Here's a step-by-step guide to help you get the job done safely and efficiently.
Materials You'll Need:
- New ceiling light fixture
- Electrical wire
- Wire stripper
- Electrical tape
- Screwdriver
- Ceiling fan-rated light switch (if adding a switch)
- Junction box (if needed)
Safety Precautions:
Before you begin, make sure to turn off the power to the circuit you'll be working on at the electrical panel. Also, wear safety glasses and gloves to protect yourself from potential electrical hazards.
Step-by-Step Instructions:
1. Remove the Old Fixture:
If there's an existing ceiling light, remove it by unscrewing the mounting screws and disconnecting the wires. Carefully pull the old fixture out of the ceiling and set it aside.
2. Install a Junction Box (if needed):
If there's no existing junction box in the ceiling, you'll need to install one. This is an electrical box that will house the wire connections for the new light.
3. Prepare the Wires:
Cut the electrical wire to the desired length, leaving enough slack for easy connections. Strip about 1/2 inch of insulation from the ends of the wires using a wire stripper.
4. Connect the Wires:
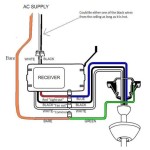
Follow the manufacturer's instructions for connecting the wires to the new ceiling light. Typically, the black wire (or red wire) connects to the black wire in the junction box, the white wire connects to the white wire, and the green or bare copper wire connects to the ground wire.
5. Secure the Light Fixture:
Carefully lift the new ceiling light into place and align it with the screws on the mounting bracket. Tighten the screws to secure the light fixture in place.
6. Install the Switch (if applicable):
If you're adding a switch to control the light, follow the manufacturer's instructions to install it in place of the existing switch.
7. Turn on the Power:
Once everything is connected, turn the power back on at the electrical panel. Test the light to make sure it works properly.
Tips:
- Use wire nuts or electrical tape to secure the wire connections.
- Pull on the wires gently to make sure they're secure.
- Double-check all connections before turning on the power.
- If you're not comfortable working with electricity, consider hiring a licensed electrician to do the job.
Conclusion:
By following these steps, you can safely and easily wire a single ceiling light. Remember to take appropriate safety precautions and double-check all connections before turning on the power. If you have any doubts or concerns, it's always best to consult with a qualified electrician.

Jim Lawrence Flush Lights Fitting Guide
How To Wire A Ceiling Fan And Separate Light One Switch Quora

Wiring A Ceiling Fan And Light With Diagrams Ptr

Wiring A Ceiling Fan And Light With Diagrams Ptr

Ceiling Fan Wiring Diagram Single Switch

Inside The Circuit Pendant Lighting Light Switch Wiring Homeowner Faqs

Ceiling Fan And Light Wiring Circuit Diagram

Replacing A Ceiling Fan Light With Regular Fixture Jlc

How To Wire A Ceiling Fan Control Using Dimmer Switch
Replacing A Ceiling Fan Light With Regular Fixture Jlc
Related Posts

