Wiring a Ceiling Fan Light Kit: A Comprehensive Guide
Installing a ceiling fan light kit can enhance both the function and style of your indoor space. However, it's essential to approach this task with the necessary knowledge and precautions to ensure a safe and efficient installation. This guide will provide you with step-by-step instructions and essential safety tips to guide you through the wiring process.
Step-by-Step Wiring Instructions
Materials Required:
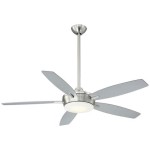
- Ceiling fan with light kit included
- Wire strippers or cutters
- Electrical tape
- Screwdriver
1. Disconnect Electricity:
Before starting any electrical work, it's crucial to turn off the power to the room at the circuit breaker or fuse box.
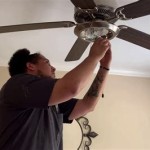
2. Mount the Ceiling Fan:
Follow the manufacturer's instructions to mount the ceiling fan securely to the ceiling.
3. Connect Wires:
- Identify the wires from the fan and the wires from the electrical box. Each wire will have a specific color indicating its function.
- Connect the white wires (neutral) together.
- Connect the black wires (hot) together.
- Connect the ground wire (green or bare copper) to the grounding terminal on the ceiling fan.
- Use wire strippers to remove about 1/2 inch of insulation from the ends of each wire before twisting them together.
- Secure the connections with electrical tape.
4. Install the Light Kit:
Now that the fan is wired, you can assemble and attach the light kit according to the manufacturer's instructions.
5. Restore Power:
Once the light kit is complete, turn the power back on at the circuit breaker or fuse box. Test the fan and light to ensure they are functioning properly.
Safety Tips
1. Electrical Hazards:
Always remember that electricity can be deadly. Never attempt to work on electrical equipment without disconnecting power first.
2. Proper Grounding:
Ensure all ground wires are connected correctly. Improper grounding can create a shock hazard.
3. Use Appropriate Tools:
Use wire strippers or cutters designed for electrical work. Avoid using scissors or knives.
4. Avoid Overheating:
When twisting wires together, be careful not to apply too much force, as this can cause the wires to overheat and break.
5. Professional Help:
If you are uncomfortable with any aspect of the wiring process, do not hesitate to seek professional assistance from a licensed electrician.
Troubleshooting
1. Fan Not Turning On:
Check wire connections, ensure power is on, and replace any faulty components if necessary.
2. Light Not Working:
Check the bulb, connections, and light kit itself. Replace any defective parts.
3. Fan Wobbles:
Tighten all screws, including those securing the fan blades, and ensure the ceiling fan is properly balanced.
Conclusion
Wiring a ceiling fan light kit requires attention to detail and adherence to safety protocols. By following the instructions and tips outlined in this guide, you can confidently upgrade the ambiance and functionality of your indoor space.

Wiring A Ceiling Fan And Light With Diagrams Ptr

Wiring A Ceiling Fan And Light With Diagrams Ptr

Wiring A Ceiling Fan And Light With Diagrams Ptr

How To Wire A Ceiling Fan Light Switch Quora

How To Wire A Ceiling Fan With Light Best Home Gear

Ceiling Fan Switch Wiring Electrical 101

Changing Ceiling Fan Light Kit Doityourself Com Community Forums

Wiring A Ceiling Fan And Light With Diagrams Ptr

Help Installing Ceiling Fan Light Kit R Askanelectrician

Ceiling Fan Light Kit Installation How To