Wiring a Ceiling Fan to a Wall Switch: A Step-by-Step Guide
Installing a ceiling fan can enhance airflow and style in your home. While the process may seem daunting, wiring a ceiling fan to a wall switch is a manageable task with a little preparation and safety precautions.
Materials and Tools
* Ceiling fan with light kit (if desired) * Wall switch * Electrical wire (14-gauge) * Wire connectors * Screwdriver * Electrical tape * Voltage testerSafety First
* Turn off the power at the circuit breaker. * Verify the power is off using a voltage tester. * Wear safety glasses and gloves.Step 1: Prepare the Wiring
* Identify the wires coming from the ceiling box: black (hot), white (neutral), and green/bare (ground). * Cut three pieces of electrical wire (14-gauge) to the length needed to connect the ceiling fan to the switch. * Strip the ends of the wires about 1/2 inch.Step 2: Connect the Wires
* Connect the black wire from the ceiling box to the black wire of the wall switch. * Connect the white wire from the ceiling box to the white wire of the wall switch. * Connect the green or bare ground wire from the ceiling box to the ground wire at the switch. * Use wire connectors to secure all connections.Step 3: Install the Wall Switch
* Mount the wall switch in its designated location and secure it with screws. * Tuck the wires neatly behind the switch plate. * Cover the switch plate to conceal the wires.Step 4: Connect the Ceiling Fan
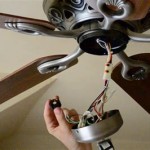
* Identify the wires coming from the ceiling fan: black (hot), white (neutral), and green/bare (ground). * Connect the black wire from the fan to the black wire from the ceiling. * Connect the white wire from the fan to the white wire from the ceiling. * Connect the green or bare ground wire from the fan to the ground wire at the ceiling. * Use wire connectors to secure all connections.Step 5: Connect the Light Kit (Optional)
* If the fan has a light kit, connect the wires from the light kit according to the manufacturer's instructions. * Black (hot) wire to black wire. * White (neutral) wire to white wire. * Ground wire to ground wire.Step 6: Mount the Ceiling Fan
* Mount the ceiling fan to the ceiling box according to the manufacturer's instructions. * Secure the canopy to the ceiling box.Step 7: Test the Fan
* Turn on the power at the circuit breaker. * Turn on the wall switch. * Verify the ceiling fan is functioning correctly.Troubleshooting
* If the fan or light doesn't turn on, check all connections to ensure they are secure. * If the fan or light turns on and off intermittently, there may be a loose connection. * If the fan makes a humming noise, check the ground wire to ensure it is connected properly.Conclusion
By following these steps, you can safely and effectively wire a ceiling fan to a wall switch. This upgrade will provide enhanced ventilation, improve lighting, and add a stylish touch to your home. Always remember to prioritize safety and consult an electrician for any electrical work that you are not comfortable performing yourself.How To Wire A Ceiling Fan Light Switch Quora

Wiring A Ceiling Fan And Light With Diagrams Ptr

Need Feedback On Wiring Fan And Switch With Smartswitches Projects Stories Smartthings Community

Wiring A Ceiling Fan And Light With Diagrams Ptr

How To Wire A Ceiling Fan Control Using Dimmer Switch

Ceiling Fan Switch Wiring Electrical 101

Wiring A Ceiling Fan And Light With Diagrams Ptr

Ceiling Fan Wiring Diagram Single Switch

How To Wire A Ceiling Fan Control Using Dimmer Switch

Ceiling Fan Switch Wiring Electrical 101
Related Posts


