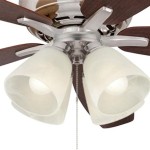
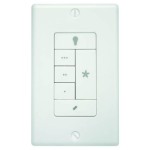
Wiring a Ceiling Fan Without a Wall Switch
Installing a ceiling fan without a wall switch can be a convenient and cost-effective way to add air circulation and style to your room. Follow these essential steps to ensure a safe and successful installation.
Materials Required:
- Ceiling fan with remote control
- Wire nuts
- Electrical tape
- Screwdriver
- Drill (optional)
Step 1: Prepare the Electrical Wiring
Locate the electrical box in the ceiling where you want to mount the fan. The box should have three wires: a black (hot), a white (neutral), and a bare copper (ground) wire. If you don't have a ceiling box, you will need to install one by cutting a hole in the ceiling and mounting the box securely.
Step 2: Connect the Wires
Using wire nuts, connect the black wire from the fan to the black wire in the ceiling box. Similarly, connect the white wire from the fan to the white wire in the ceiling box. Twist the wire nuts clockwise and secure them with electrical tape.
Step 3: Connect the Ground Wire
Using a wire nut, connect the bare copper ground wire from the fan to the bare copper ground wire in the ceiling box. Twist the wire nut clockwise and secure it with electrical tape.
Step 4: Mount the Fan Base
Align the fan base with the ceiling box and insert the mounting screws. Tighten the screws securely using a screwdriver. If your ceiling is vaulted or sloped, you may need to use a mounting bracket to secure the fan base.
Step 5: Hang the Fan Body
Carefully lift the fan body and hang it onto the ball joint of the fan base. Ensure that the fan is securely in place.
Step 6: Connect the Fan Blades
Attach the fan blades to the fan body according to the manufacturer's instructions. Use a screwdriver to tighten the screws that secure the blades.
Step 7: Power On and Test
Turn on the power at the circuit breaker and use the remote control to operate the fan. Check if the fan rotates smoothly and responds to the remote control commands.
Additional Tips:
- Consult a qualified electrician if you are not comfortable working with electrical wiring.
- Always turn off the power at the circuit breaker before starting any electrical work.
- Use proper wire connectors and electrical tape to ensure a secure connection.
- Make sure the fan is securely mounted to the ceiling to prevent it from falling.
- Clean the fan blades regularly to maintain optimal air circulation.
By following these steps, you can successfully install a ceiling fan without a wall switch, adding both style and comfort to your living space.

Wiring A Ceiling Fan And Light With Diagrams Ptr

How To Wire A Ceiling Fan Temecula Handyman

Wiring A Ceiling Fan Light Part 1
How To Wire A Ceiling Fan Light Switch Quora

Replacing A Ceiling Fan Light With Regular Fixture Jlc
Replacing A Ceiling Fan Light With Regular Fixture Jlc

Ceiling Fan Wiring Diagram

Universal Ceiling Fan And Light Remote Control Kit Add A No In Wall Wiring Required Switch Sd Timming On Off Scene With Receiver Plate

Hard Wiring A Switch To Bluetooth Ceiling Fan R Electricians

Wiring A Ceiling Fan Light Part 1
Related Posts


