Wiring a Ceiling Light with a Switch: A Comprehensive Guide
Installing a ceiling light with a switch is a common household task that requires basic electrical knowledge and skills. Whether you're replacing an old fixture or adding a new one, understanding the wiring process is crucial for safety and proper functionality.
Essential Tools and Materials
Before you begin, gather the necessary tools and materials:
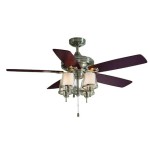
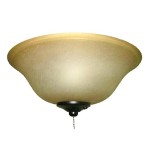
- Ceiling light fixture
- Electrical switch
- Wire nuts
- Electrical tape
- Screwdriver
- Wire strippers li>Voltage tester
Safety Precautions
Before handling any electrical wiring, it's essential to take safety precautions:
- Turn off the power at the breaker panel.
- Use a voltage tester to confirm that the wires are not live.
- Wear safety glasses and gloves.
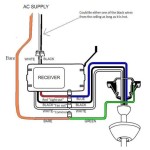
Wiring Diagram for Ceiling Light with Switch
The wiring diagram for a ceiling light with a switch typically involves three wires:
- Black wire (hot): Connects to the brass-colored screw on the switch and the black wire on the ceiling.
- White wire (neutral): Connects to the silver-colored screw on the switch and the white wire on the ceiling.
- Green wire (ground): Connects to the ground screw on the fixture and the bare copper or green wire on the ceiling.
Step-by-Step Wiring Instructions
Once you understand the wiring diagram, follow these steps:
1. Connect the wires: Strip about 1/2 inch of insulation from the ends of the wires. Twist the bare ends of the black wires together and secure them with a wire nut. Repeat this process for the white and green wires. 2. Mount the fixture: Position the ceiling light fixture over the junction box and secure it with the provided screws. 3. Connect the switch: Insert the black wire from the ceiling into the brass-colored screw on the switch. Insert the white wire into the silver-colored screw. Twist the green wire around the ground screw. 4. Secure the wires: Push the wires into the junction box and make sure all connections are snug. 5. Wrap with electrical tape: Wrap electrical tape around the wire nuts and any exposed wires for added insulation. 6. Turn on the power: Restore power at the breaker panel and test the light and switch to ensure they work correctly.Troubleshooting
If the ceiling light or switch doesn't work properly, check the following:
- Make sure all connections are secure.
- Check that the circuit breaker is not tripped.
- If the switch is faulty, replace it.
- If the wiring is damaged or loose, contact a qualified electrician.
Conclusion
Wiring a ceiling light with a switch is a straightforward task with proper preparation and safety precautions. By following the steps outlined in this guide, you can confidently install and operate your ceiling light with confidence.

Light Switch Wiring Diagrams

How To Install A One Way Light Switch Socketsandswitches Com

Light Switch Wiring Diagrams Do It Yourself Help Com

Electrics Single Way Lighting

Ceiling Fan Wiring Diagram Single Switch

Extending A Lighting Circuit Step By Guide And

Wiring A Ceiling Fan And Light With Diagrams Ptr

Jim Lawrence Flush Lights Fitting Guide

Light Wiring Diagrams Fitting

How To Install A One Way Light Switch Socketsandswitches Com
Related Posts